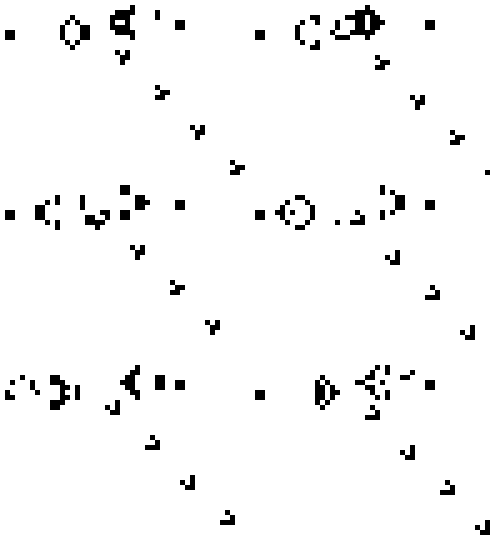
Using React Hooks to Build Single Responsibility Components
May 04, 2020
This blog post is the first part of a series where I am building Conway’s Game of Life.
If you aren’t familiar with Conway’s Game of Life, it is a zero-player game on a grid that mimics the life cycle of cells. There are four basic rules:
- Any live cell with fewer than two live neighbors dies, as if by underpopulation.
- Any live cell with two or three live neighbors lives on to the next generation.
- Any live cell with more than three live neighbors dies, as if by overpopulation.
- Any dead cell with exactly three live neighbors becomes a live cell, as if by reproduction.
You should be able to start the game with a “seed”, or an initial set of live cells that can take any shape on the board. Then you should be able to run the game and see the cells change shape with each generation.

Building the game
Let’s start by building a basic view component.
In my view, I am going to be rendering a list of cells. Since I’m using Typescript, I can assign these cells a type.
type Cell = {
  x: number
  y: number
  living?: boolean
}
In this case, x and y refer to a cell’s position on the grid. For example, the cell in the lower-left corner would have the values { x: 1, y: 1 }.
If I am rendering an SVG, I can render each cell as a rect object. The x and y values in the SVG object represent the position of the object in relation to the total width and height of the SVG, so we will have to derive them from the size of the cell.
<rect
  x={getBoardPosition(x, cellSize)}
  y={getBoardPosition(y, cellSize)}
  width={cellSize}
  height={cellSize}
  fill={living ? FILL_COLOR : BACKGROUND_COLOR}
/>
If I put the whole view together, I might have something that looks like this. Notice how we haven’t implemented any logic yet, just some placeholders where it will go later.
const World: React.SFC<WorldProps> = ({
  gridSize = GRID_SIZE,
  cellSize = CELL_SIZE,
}) => {
  const gridWidth = cellSize * gridSize

  function getFill(cell) {
    // TODO
  }

  return (
    <svg
      width={gridWidth}
      height={gridWidth}
      viewBox={`0 0 ${gridWidth} ${gridWidth}`}
    >
      {cells.map(cell => {
        const { x, y } = cell
        return (
          <Cell
            size={cellSize}
            cell={cell}
            fill={getFill(cell)}
            key={`${x}-${y}`}
            onClick={() => // TODO}
          />
        )
      })}
    </svg>
  )
}
Assigning responsibilities
At its most basic level, this application needs to do two things. It needs to perform calculations based on the rules to determine which cells are alive or dead in the next generation, and it needs to render these cells in a view, as we have started to do above.
For a simple component, I might put the business logic and the rendering together in the same function. After all, there’s really no use breaking out a separate helper if I need three lines of logic to parse a string.
But when I have more complex business logic like this game requires, there is a case to be made for building two entities—one for each responsibility. And by entity, I mean an encapsulated component, class, or set of helpers.
Testability
My example here is just a game, but in a real world component with complex business logic, there might be real-world consequences for getting it wrong. Separating your logic from your component rendering makes it easier to test.
Preparing for change
When I started building this application I built a board that renders using SVG. But as I increased the size of my board, I noticed a big performance hit as my component was rendering hundreds or thousands of individual SVG elements. If I decide I care about this later, this might be a use case for HTML5 canvas instead.
But if I create a board using canvas, I don’t want to copy and paste all of my existing logic from my SVG board. If I could just import my game logic into both boards, I could save a lot of trouble.
Finding the right abstraction
I know now that I need to keep my logic separated from my view component, but finding the right abstraction for business logic can be tricky. In many languages, I might use a class to encapsulate my logic. However, after trying out a few options, I decided to build out my game logic using a custom hook. Hooks can access React state, and therefore can automatically trigger a re-render when the state changes, e.g. when a cell dies or comes alive with each generation. If I used a different abstraction, I would have to do a little more work in the view itself to make sure the state of my game and the state of my view stay in sync.
Using this custom hook, I can now access my state and helper functions from my view without adding a lot of logic to the view itself. I can also avoid creating wrapper components or introducing a lot of nesting.
const World: React.SFC<WorldProps> = ({
  gridSize,
  cellSize,
  backgroundColor,
  fillColor,
}) => {
  const {
    cells,
    setLivingAt,
    tick,
    reset,
    isAliveInNextGeneration,
    hasLivingCells,
  } = useGameOfLife(gridSize)

  const gridWidth = cellSize * gridSize

  function getFill(cell) {
    const { living } = cell
    return living ? fillColor : backgroundColor
  }

  return (
    <>
      <svg
        width={gridWidth}
        height={gridWidth}
        viewBox={`0 0 ${gridWidth} ${gridWidth}`}
      >
        {cells.map(cell => {
          const { x, y } = cell
          return (
            <Cell
              size={cellSize}
              cell={cell}
              fill={getFill(cell)}
              key={`${x}-${y}`}
              onClick={() => {
                setLivingAt({ x, y })
              }}
            />
          )
        })}
      </svg>
      <div>
        <button disabled={running} onClick={() => tick()}>
          Tick
        </button>
        <button disabled={running} onClick={() => reset()}>
          Reset
        </button>
      </div>
    </>
  )
}
To learn about building this hook, check out my next post: Building a Developer-Friendly Interface with Custom Hooks.

I'm a software engineer who loves to design things. After previous career as an elementary fine arts teacher, I love helping artists and career changers understand software. You should follow me on Twitter.
